How to Make a Charcuterie Board
This post gives you a step-by-step guide on how to make a charcuterie board that will wow your guests.
Every time I host a party at my house, I make a charcuterie board. The best part is that if you pre-prep, you can make a charcuterie board ahead of time. All you have to do is assemble right before.
Today, I want to share with you how I make a charcuterie board for my parties. There are many reasons to consider adding one to your menu. From the easy plan ahead to the outstanding visual it makes, everyone seems to love a charcuterie board.
{Related Post: How to Plan a Dinner Party: A Step-by-Step Guide for Stress-Free Entertaining}
Step-by-Step Guide for Drool-Worthy Charcuterie Board:
Step 1: Plan Your Meats and Cheeses
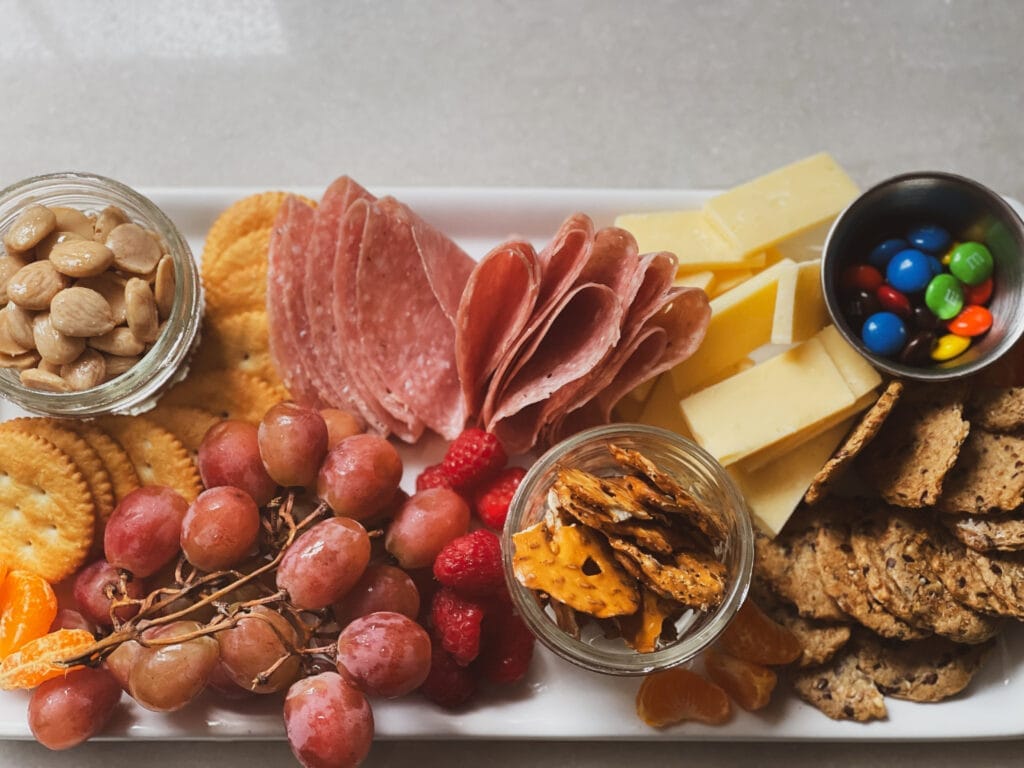
It sounds a little obvious, but it matters. You need to know your audience. When I have friends, I can plan on brie. My family, however, does not ever eat cheese like Brie, so I plan to have harder cheeses. Some people hate to have “moldy” cheeses, so it may be a waste of money to invest in a fancy roquefort. To please the crowd, my go-to’s include a good cheddar, BellaVitano, and manchego. Some may say that my cheese selections don’t blend, but, honestly, it’s whatever your crowd likes.
The same goes for your meats. I’ve spent a pretty penny on having prosciutto, but it never goes. My people prefer the basics: salami and pepperoni. Just because you choose a familiar meat doesn’t mean that you can’t wow with the presentation. I always go to the deli counter and ask for 1/3 pound of each sliced very thin. This allows me to create flowers or other designs with the meat.
If you think your family will love the higher-end meats, go for it, but keep an eye on what’s left over, so you know if it’s a win for next time.


Step 2: Decide which Carbs
Get a variety of about 3 types of crackers. People have different preferences, and it’s nice to take that into account so that everyone can enjoy it. If you want to create variety, you can offer a heavier cracker, like Ritz; a classic water cracker, and Flatbread crackers with everything seasoning (my personal favorite). Sliced baguette and oil is also a beautiful addition to a board.
Step 3: Choose your fruits
While grapes are a fantastic go-to for your platter, it’s not the only option. Try adding clementines to the plate for more color. Here are some of my favorite fruits to sprinkle onto the platter:
- Grapes
- Clementines
- Strawberries (with or without the leaves)
- Raspberries
Step 4: Have fun with add-ons
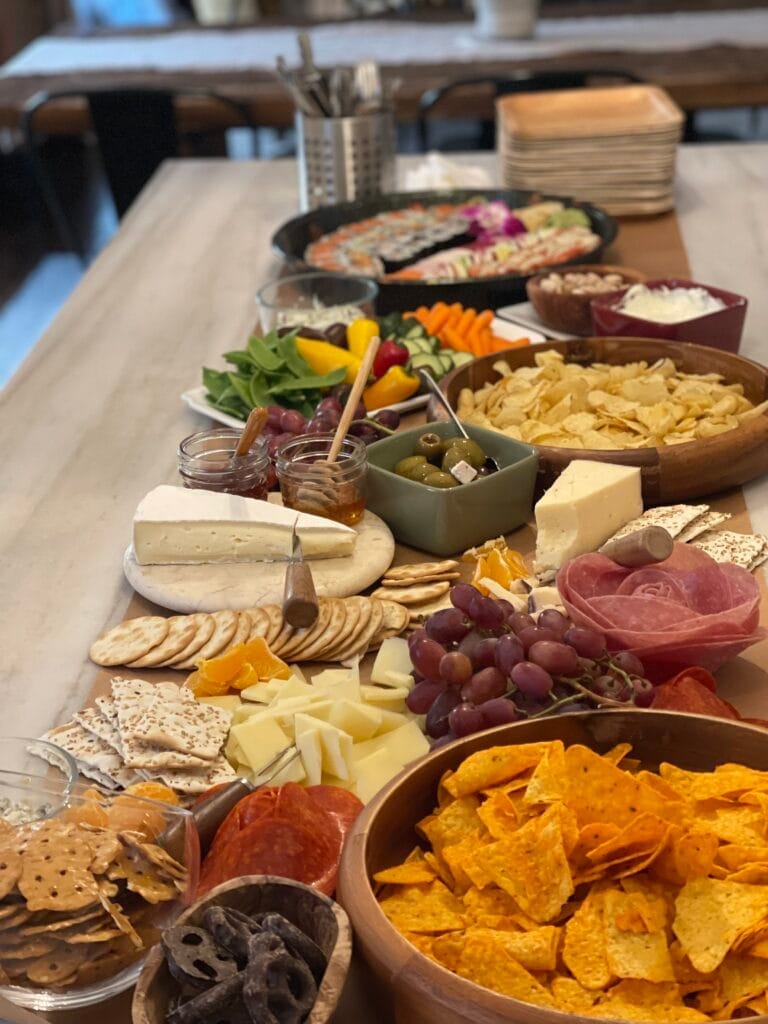
If you look at the picture at the top of this post, you will notice that there are A LOT of different foods you can add to your board to make it as abundant as you want it to be. The board posted above was more about having a full zone for grazing during a night with friends. Not only did it have cheeses, but I added sweets (chocolate-covered pretzels), chips, nuts, a veggie platter, and, at the end, a sushi platter.
Some great options include:
- Honey to drizzle on the cheese (if you haven’t tried this, you’re missing out)
- Marcona almonds or a mixed nut
- Chocolate Covered Pretzels
- M & Ms (not just for the kids)
- Spinach dip
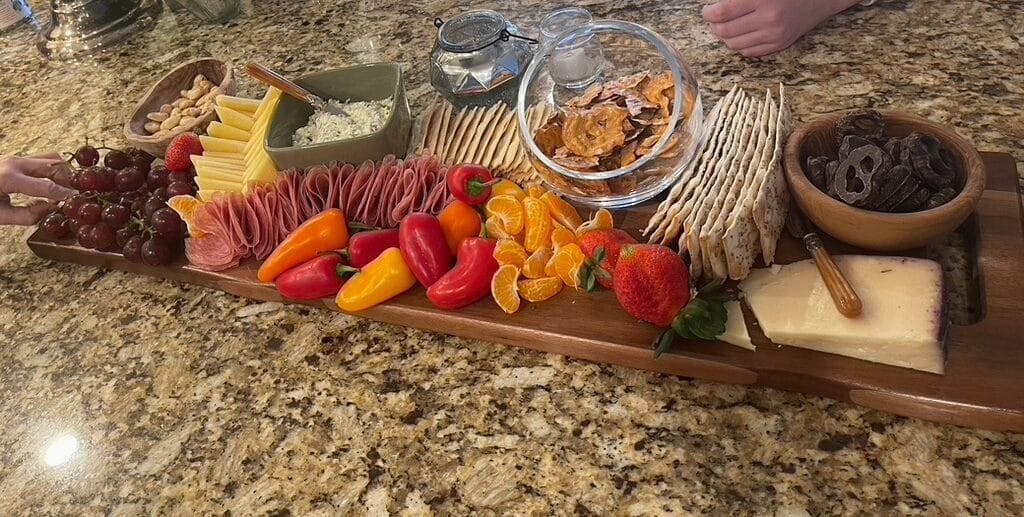
It doesn’t have to be as grand as what is shown above. I’ve created ones on cutting boards, boards designed for cheese and crackers, and, as shown above, food-grade kraft paper. Make the decision based on what you can afford and how many people you will have at your event.
How to design a charcuterie board
The first step is to determine what actual board you will be using. As I stated above, you can use a clean cutting board, a platter, kraft paper, or a board designed specifically for meats and cheeses.
Once you’ve determined what you’re using, place little bowls where you want them. I love using ramekins because they’re easy to clean and refill.
The next step is placing the crackers. Again, I like to place them in different spots spaced far apart so that anyone coming from a different angle can grab something. Once these items are placed, I put my flowers or meats folded in different spots for the same reason: your guests don’t have to reach over to grab what they want.
After that, I place mounds of cut cheeses or wedges close to the meats. I prefer the rustic cuts instead of keeping the slices all the same. I think it looks prettier.
Finally, I find empty nooks where I can place smaller items, like clementines or grapes.
What You Can Do Ahead of Time
The day before, I cut all the cheeses that need to be cut. Whether I’m stacking the salami and pepperoni or making flowers of them, I can assemble those and put them in an air-tight container. If you decide to build out your board a little more and vegetables, you can also cut any that need to be cut and put them in an air-tight container, too.
The Best Part of Charcuterie Boards
It’s tough to say what the best part of adding a charcuterie board to your menu is. They create a social spot because everyone gathers around to nosh, and they also create a centerpiece for your appetizer display. They can be as lavish and expensive as you choose through the cheese and meat selections.
Please share your successes with these tips below!

